If the servers providing the revocation list distribution points are located in a Demilitarized Zone (DMZ), for example, or data transfer via Server Message Block (SMB) is not possible for other reasons, the blacklists can be transferred to the distribution points using SSH Secure Copy (SCP). As of Windows Server 2019, the OpenSSH server and client packages are available. The following describes the setup with authentication via public keys (Public Key Authentication) instead of passwords as an example
Do you know TameMyCerts? TameMyCerts is an add-on for the Microsoft certification authority (Active Directory Certificate Services). It extends the function of the certification authority and enables the Application of regulationsto realize the secure automation of certificate issuance. TameMyCerts is unique in the Microsoft ecosystem, has already proven itself in countless companies around the world and is available under a free license. It can downloaded via GitHub and can be used free of charge. Professional maintenance is also offered.
Optional: Procure installation media
If the systems on which the SSH server or SSH client is to be installed can communicate with the Internet (which is not recommended, of course), you can proceed directly to the next step.
However, if they do not have access to the Internet, the Featured On Demand ISO files for Windows 10 and for Windows Server 2019 are required.
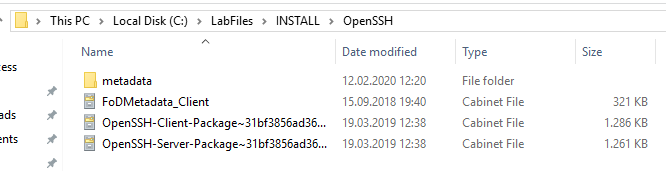
The contents of the Features On Demand ISO file for Windows Server 2019 are copied in their entirety to a local folder (for example: C:\LabFiles\Install\OpenSSH).
From the Features on Demand ISO file, the following two files are copied to the previously created folder:
- OpenSSH-Client-Package~31bf3856ad364e35~amd64~~.cab
- OpenSSH-Server-Package~31bf3856ad364e35~amd64~~.cab
Preparing the client
On the system that is to initiate the copy process, the SSH client is installed with the following PowerShell command, provided that the system can communicate with the Internet.
Add-WindowsCapability -Online -Name OpenSSH.Client~~~~0.0.1.0
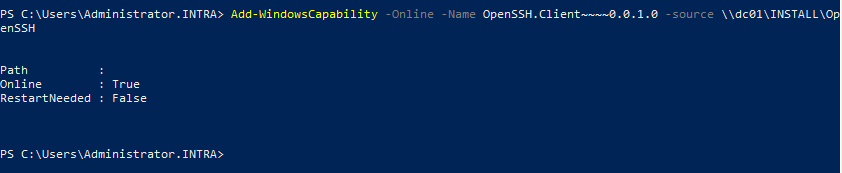
If it cannot communicate with the Internet, the -Source argument is given with the path to the installation files.
Add-WindowsCapability -Online -Name OpenSSH.Client~~~~0.0.1.0 -source C:\LabFiles\Install\OpenSSH
The SSH identities are managed by the ssh-agent service, which must be configured and started to start automatically.
Set-Service ssh-agent -StartupType Automatic
Start-Service ssh-agent

Afterwards, an SSH key pair can be made under the identity of the user account that is to perform the copy process. The following command is executed for this purpose:
ssh-keygen
For automatic tasks, it is convenient to run it with the identity of the computer account (NT-AUTHORITY\SYSTEM), because it has all the necessary rights and automatically changes its password. Thus, neither a local, nor a domain account is required and there is no need to change the password manually on a regular basis.
This is also possible when running the ssh-keygen command under this identity. This can be done for example with psexec take place.
psexec -s -i cmd.exe
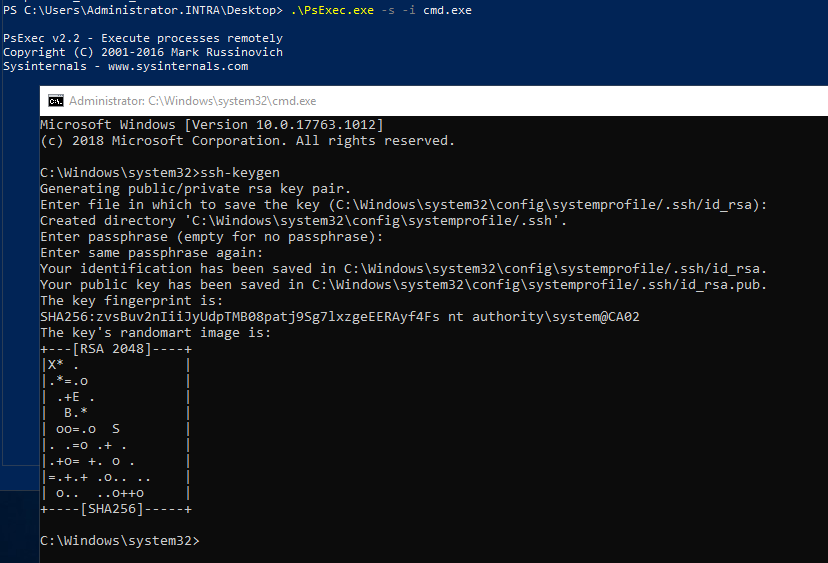
The SSH key pair is stored in a .ssh subfolder within the user profile.
For the SYSTEM account this is C:\Windows\System32\config\systemprofile\.ssh.
- The file id_rsa contains the private key, this must not be given out.
- The id_rsa.pub file contains the public key, which is stored on the target systems.
Prepare the server
On the system to which the files are to be copied, the SSH server is installed with the following PowerShell command, provided that the system can communicate with the Internet.
Add-WindowsCapability -online -name OpenSSH.Server~~~~0.0.1.0
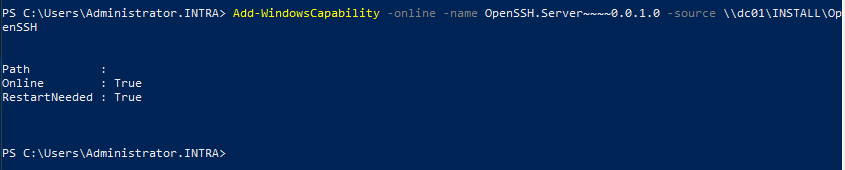
If it cannot communicate with the Internet, the -Source argument is given with the path to the installation files.
Add-WindowsCapability -online -name OpenSSH.Server~~~~0.0.1.0 -source C:\LabFiles\INSTALL\OpenSSH
The sshd and ssh-agent services must be configured and started for automatic startup.
Set-Service sshd -StartupType Automatic
Start-Service sshd
Set-Service ssh-agent -StartupType Automatic
Start-Service ssh-agent

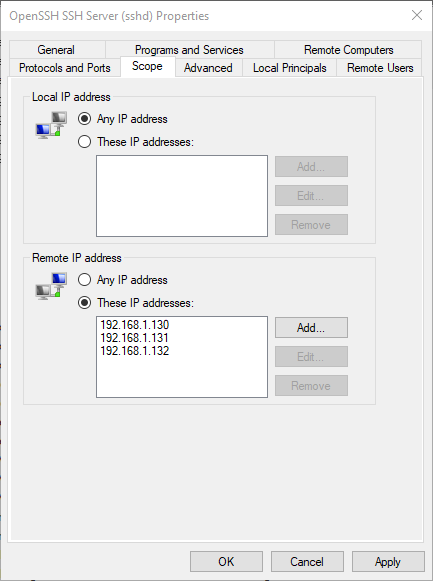
Optional: Configure Windows firewall
With the installation of the OpenSSH server, an incoming firewall rule for SSH is automatically created. This can be left as is without further ado.
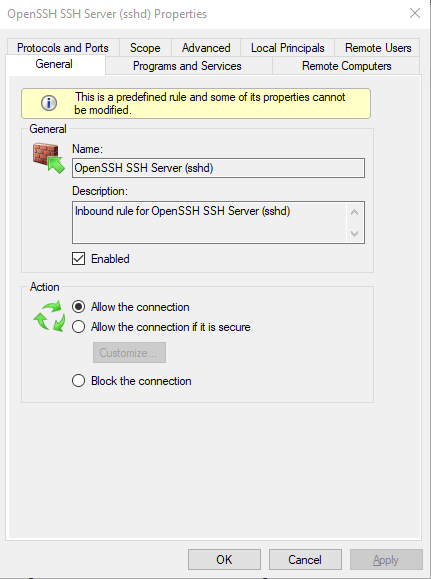
Optionally, you can restrict the source IP addresses that are allowed to communicate with the system via SSH.
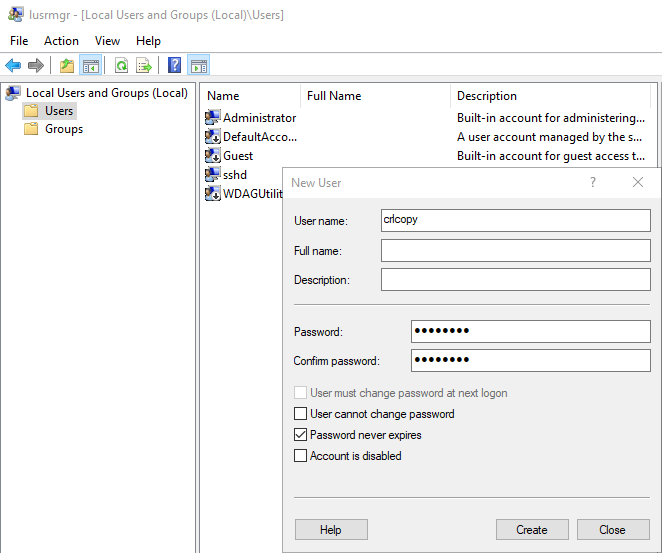
Create user for copy task
An unprivileged user should be created on the target system, under whose identity the blacklists are copied
Attention: The user must not be a member of the Administrators group, because then a different procedure for depositing the public keys is required.
It is advisable to choose a very strong password for this user account.
The user must log on to the system once for a user profile to be created.
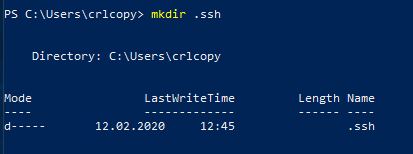
Deposit SSH identity
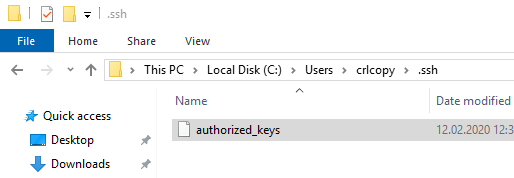
A subfolder .ssh must be created in the user profile of the copy account. The Windows Explorer will refuse this, but via command line it is possible without any problems.
mkdir .ssh
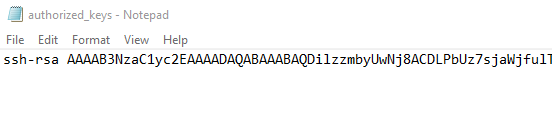
The file id_rsa.pub is copied into this folder and renamed to authorized_keys.
If several keys are to be stored, they can be entered in the authorized_keys file with a text editor.
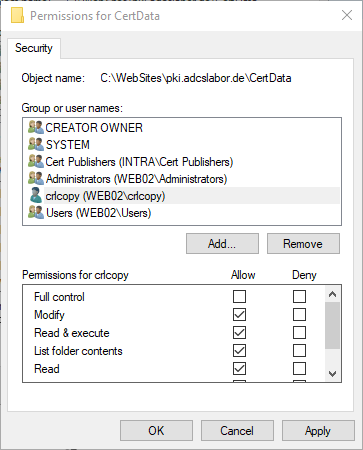
Assign write permissions
Since the user is unprivileged, he still needs write permissions to the destination folder.
Establish connection
Now an SSH connection can be established from the sending system to the target system.
First, a shell connection should be established to make the server key of the target system known. The syntax is:
ssh {Benutzername}@{Zielserver}

If successful, you now have a shell connection on the target system.
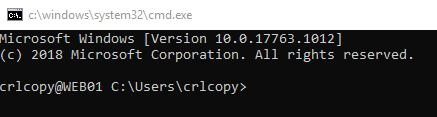
You can log out of it with the exit command.
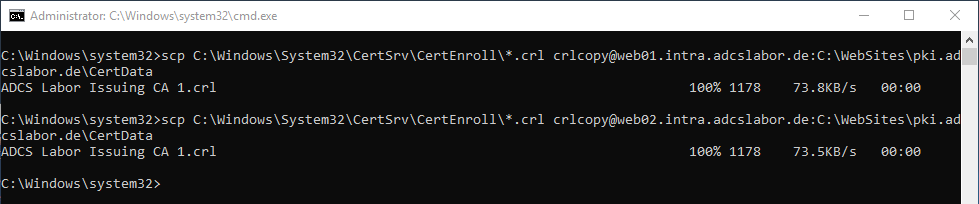
Now the copy process can be made. The syntax is:
scp {Quell-Ordner}\*.crl {Benutzername}@{Zielsystem}:{Zielpfad}
Comments are closed.