If you want to equip a large quantity of systems with certificates, a Manual request and renewal of certificates is not an option. The only viable path is automation.
For systems that are not members of the Active Directory forest, an automatic certificate request via RPC/DCOM not an option.
For certain use cases, the Simple Certificate Enrollment Protocol (SCEP) is an interesting alternative. There are not only clients for Windows for this protocol, but also for Linux with SSCEP. SSCEP is used, among other things, by thin clients with the eLux operating system used.
The following describes how to set up the SSCEP client on a Debian Buster Linux system - either to use it to manage servers or to be able to test the client-side behavior.
The Network Device Enrollment Service (NDES) provides a way for devices that do not have an identifier in Active Directory (for example, network devices such as routers, switches, printers, thin clients, or smartphones and tablets) to request certificates from a certification authority. For a more detailed description, see the article "Network Device Enrollment Service (NDES) Basics„.
Translate and install the SSCEP client
Unfortunately, SSCEP is not yet available as a package for Debian. It must therefore be compiled from the source code.
To do this, the following dependencies must be installed:
apt install git build-essential automake libtool pkg-config libssl-dev
Then the source code can be downloaded from the Git repository.
git clone https://github.com/certnanny/sscep.git
cd sscep
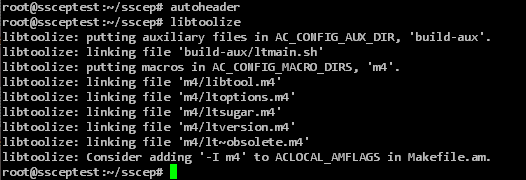
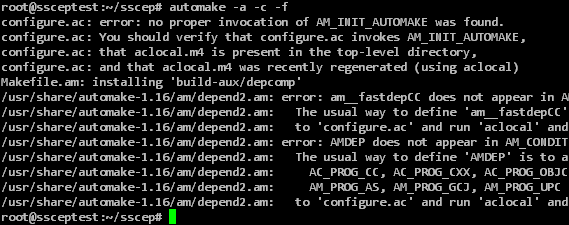
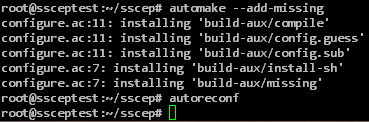
Since SSCEP was developed with cross-platform support in mind, the files needed to translate the source code for Linux must first be generated.
autoheader
libtoolize
automake -a -c -f
automake --add-missing
autoreconf
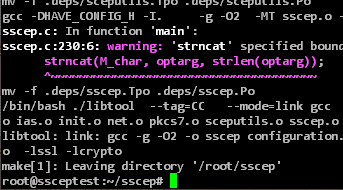
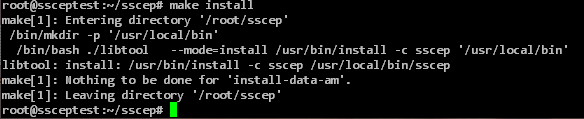
Afterwards, the source code can be translated and the translated program can be installed.
./configure
make
make install
Configuring the SSCEP Client
Do you know TameMyCerts? TameMyCerts is an add-on for the Microsoft certification authority (Active Directory Certificate Services). It extends the function of the certification authority and enables the Application of regulationsto realize the secure automation of certificate issuance. TameMyCerts is unique in the Microsoft ecosystem, has already proven itself in countless companies around the world and is available under a free license. It can downloaded via GitHub and can be used free of charge. Professional maintenance is also offered.
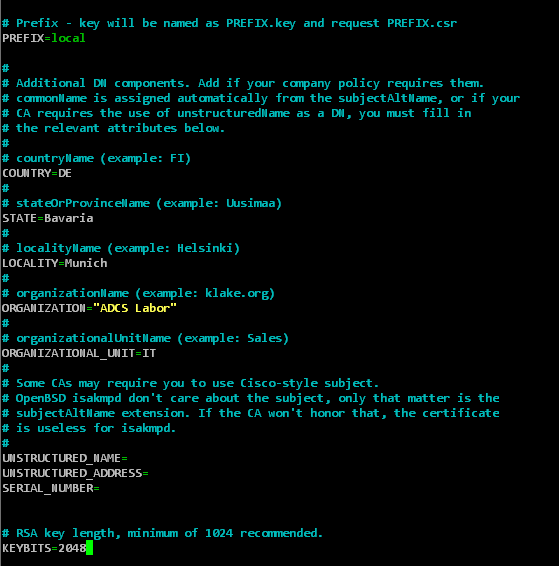
For the generation of a certificate request, a shell script called mkrequest is included in the source code, which has to be made executable and customized.
chmod +x mkrequest
nano mkrequest
In the configuration file, the file names for certificate request and key, the general fields of the subject and the key length can be configured.
Please note that the certification authority behind NDES will reject the certificate request if the key length was configured too small here.
The script must also be adjusted so that (if this is used) the one-time password is in the correct encoding. The following line must be added in the "[ req ]" area:
string_mask = nombstr
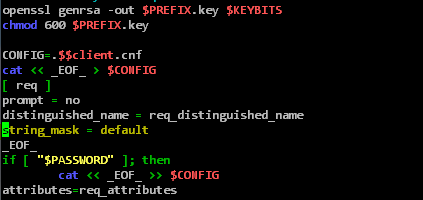
This step is required because OpenSSL encodes certificate attributes in UTF-8 in the default configuration, including the one-time password that is stored as an attribute in the certificate request. NDES cannot interpret a one-time password encoded in UTF-8, so the certificate request would fail.
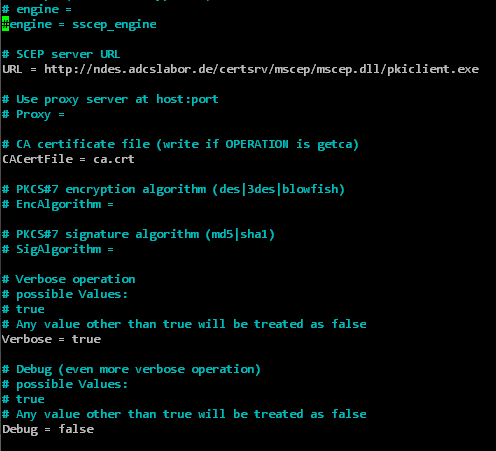
For SSCEP a configuration file is also included in the source code, which has to be adapted.
nano sscep.cnf
The following settings should be made here:
| Variable | Description | Example |
|---|---|---|
| URL | The full address of the NDES server. | http://{ndes-server}/certsrv/mscep/mscep.dll/pkiclient.exe |
| CACertFile | The file name of the certification authority certificate (will be loaded from the NDES server in the following step and written to this file). | ca.crt |
| Debug | Debug logging. This is enabled by default, but generates a lot of command line output. | false |
In the next step, the GetCACert operation can now be triggered.
sscep getca -f sscep.cnf
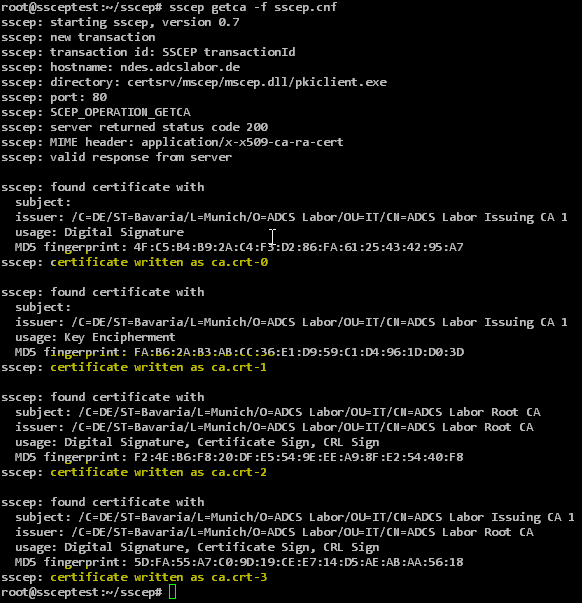
NDES returns more than one certificate. These are provided with a suffix (0...n) analogous to the file name configured in the URL variable.
With a two-level certification authority hierarchy, there are four certificates in total:
| File name | Certificate type |
|---|---|
| ca.crt-0 | NDES Enrollment Agent Certificate |
| ca.crt-1 | NDES CEP Encryption Certificate |
| ca.crt-2 | CA certificate of the root certification authority |
| ca.crt-3 | CA certificate of the issuing certification authority |
The CA certificate of the root CA can (and should) be verified to be the correct CA using the following command (the MD5 fingerprint is displayed in the NDES administration web page, the RFC requires this to be explicitly trusted):
openssl x509 -in ./ca.crt-2 -noout -fingerprint -md5

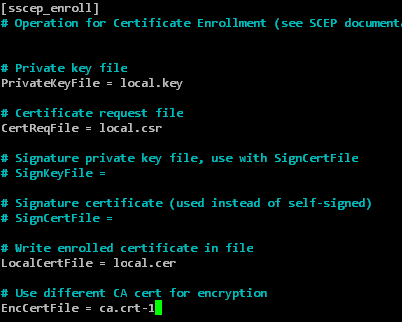
Afterwards the sscep.cnf must be edited again.
nano sscep.cnf
The following variables must be defined.
| Variable | Description | Example |
|---|---|---|
| CaCertFile | must correspond to the NDES Enrollment Agent certificate | ca.crt-0 |
| EncCertFile | must comply with the NDES CEP Encryption certificate | ca.crt-1 |
| LocalCertFile | must match the filename of the returned certificate | local.cer |
| CertReqFile | must correspond to the previously generated CSR | local.csr |
| PrivateKeyFile | must match the private key of the previously generated CSR | local.key |

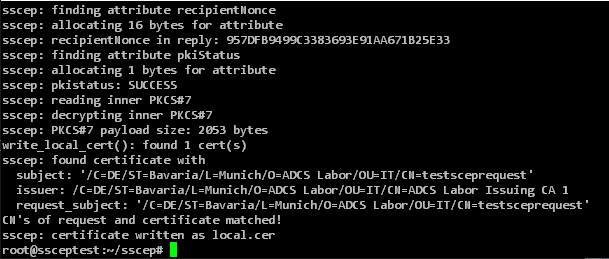
Applying for a certificate with SSCEP
After the configuration is complete, the certificate request can be created and a certificate can be requested. If the NDES server requires a one-time password, this must of course be requested beforehand via the NDES administration web page.
./mkrequest -dns 'testsceprequest' {Einmalkennwort}
sscep enroll -f ./sscep.cnf
Troubleshooting
SSCEP will unfortunately give the same error message in almost all cases when the NDES server has rejected the certificate request:
sscep: reason: Transaction not permitted or supported
sscep: illegal size of payload

Here are some possible causes that can trigger this error message:
- Wrong or already used Challenge Password used (would Event #29 on the NDES server trigger).
- Encoding of the challenge password in UTF-8 instead of PrintableString (would be Event #29 on the NDES server trigger).
- Key size too small (would Event #31 on the NDES server trigger).
In sscep.cnf the debug directive can be set to true to output more detailed messages as well as the SCEP messages on the command line. In the PKCS#7 response of the NDES server there is usually an attribute which specifies the SCEP error code according to RFC includes.
Related links
- Certificate Enrollment for Windows Systems via the Network Device Enrollment Service (NDES) with Windows PowerShell
- Manually requesting a Remote Desktop (RDP) certificate
- Basics of manual and automatic Certificate Enrollment via Lightweight Directory Access Protocol (LDAP) and Remote Procedure Call / Distributed Common Object Model (RPC/DCOM)
External sources
- certnanny / sscep (GitHub)
- draft-nourse-scep-23 - Simple Certificate Enrollment Protocol (Internet Engineering Task Force)
- The hardware-independent operating system for cloud computing (Unicon GmbH)
- OpenSSL req (OpenSSL Software Foundation)
Comments are closed.